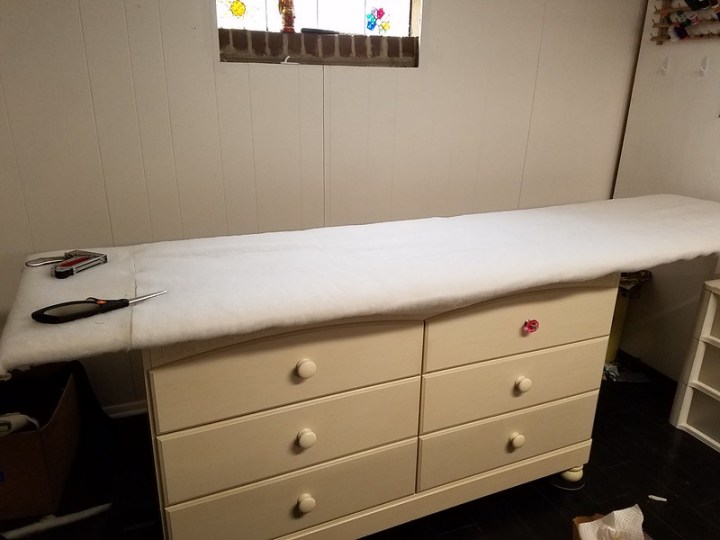
I am lucky enough to have a dedicated sewing room in my basement. When we moved in I wanted to get some storage built. The husband found someone to do it. The plan was brilliant if I do say so myself. I wanted two floor to ceiling cabinets with a huge ironing board overtop of stacks of drawers. The idea was to be able to lay out a whole quilt top and iron the longest seams.
I got the two cabinets fairly quickly. Then, crickets. He never came back to do the drawers. Never. The husband would see him around and ask and it was clear that part two of the project was never going to happen.
Fast forward to now. I was trying to figure out how to make it myself. I thought about getting dressers or stock cabinets or something. Then, we ended up breaking down Z’s room since she is not able to come back here anymore. She has a dresser. It was only 4 feet long so it didn’t fill the whole space but it was available and free. I cleared out the plastic tubs I was using to store my smaller pieces of fabric by color. The fabric lives in the dresser now. We put the dresser in that space on furniture sliders so I can move it around fairly easily. Ideally, I wanted it on wheels because the ironing surface needs to be a bit away from the wall so you can drop the already pressed area down behind the board. Since there will be a gap, I know I will drop other stuff. I wanted to be able to move it so stuff wouldn’t be lost forever.
I went to Lowe’s and got a very sturdy piece of plywood. I had them cut it to 2 feet by 8 feet.
I placed it on the dresser. I had some thick batting. I put one layer on the board and stapled it in place.
I bought 3 yards of Kona Steel for the cover. I stapled that in place making sure to pull it tight.
I moved the dresser back into place and centered the board on it. I had brackets to put on the side of the dresser to support the edges of the board but I forgot that the dresser had a fancy lip on it. The brackets won’t lay flat. The board I chose is very sturdy so for now I’m leaving it alone. If it starts to bow later I’ll find some way to fix it.
I added a flat wall plug extension cord to the plug behind the dresser. I used a command hook to keep the cord in reach. My iron doesn’t have an off button. If it is plugged in, it is on. I keep the iron to the left because I am left handed.
I still had the issue of the dresser not reaching all the way across the space. I wanted it to look more finished so I bought some tension rods and the cheapest curtains on Amazon to hide my scrap bin.
The whole project cost under $100 (not counting the initial purchase price of the dresser) and took less than an hour to complete. I have one unintended consequence though.
Now hanging out in the sewing room with Mommy is more comfortable. Soon after this picture he was sprawled out full length. He doesn’t understand why he can’t play with the iron though. I may need to find a way to wall mount the iron so this fool doesn’t burn himself.


That is an epic ironing board. Someday I would love to make one. I’m looking for some sort of solution to my ironing problems right now, but I’m not sure there is one. I might have to buy a (newer) folding one and keep it folded unless it’s being used. My current board is a good 50 years old — tough and strong, but stuck open and almost impossible to close.